Brake Disc Thickness Checker
This tool helps determine if your brake discs can remain after replacing brake pads. Based on measurements from your vehicle's specific make and model, it evaluates whether your rotors are within safe operating limits.
Key Takeaways
- You can replace brake pads without swapping the discs if the rotors are still within wear limits.
- Measure rotor thickness, check for warping, and look for surface scoring before deciding.
- Typical pad‑only jobs save 30‑50% on parts and labour compared with a full pad‑and‑disc overhaul.
- If you hear squeal, feel pulsation, or see uneven pad wear, the disc is likely the culprit.
- Always bolt‑tighten caliper bolts to the manufacturer’s torque spec and bleed the brake fluid after work.
When a car’s stopping power feels a little soft, most owners instinctively wonder whether they need a full brake overhaul or just a quick pad swap. The short answer: you often can change the pads and leave the discs (also called rotors) alone, but only if the rotors are still healthy. Below we break down how the braking system works, what signs tell you the discs are fine, when they need attention, and how to make an informed decision at the shop or in the garage.
Brake pads are the friction material that presses against the Brake discs (or rotors) to slow the wheel. When you press the pedal, hydraulic pressure pushes the caliper pistons, which squeeze the pads onto the rotating disc. The resulting friction converts kinetic energy into heat, slowing the vehicle.
How Pads and Discs Work Together
The braking system is a closed loop of components: brake pedal → master cylinder → brake fluid → brake lines → caliper → pistons → pads → disc → wheel. The pads are consumable; they wear down over time as they grind against the disc’s surface. The disc, made of cast iron or steel, is much harder and is designed to endure heat and friction for many tens of thousands of miles.
Because the disc is more robust, it usually outlasts the pads. However, a disc can still suffer from:
- Excessive thinning from repeated heat cycles.
- Warping due to uneven heating.
- Surface scoring or rust that reduces pad‑to‑disc contact.
If any of those conditions appear, changing just the pads won’t restore proper braking performance.
When a Pad‑Only Replacement Is Safe
Most everyday drivers fall into the “pad‑only” scenario. Here’s what to look for before you decide:
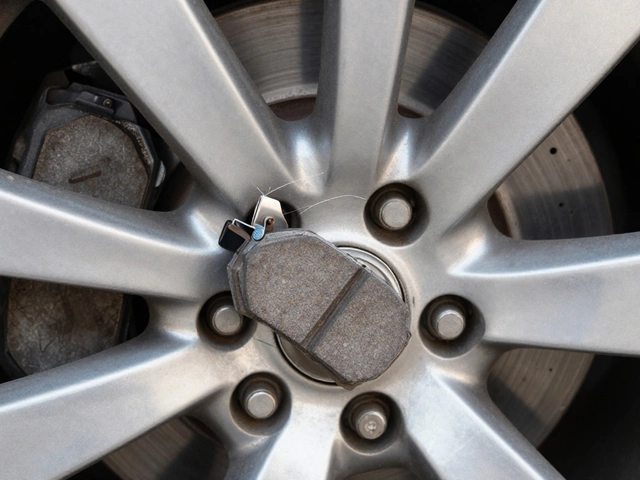
- Pad thickness: New pads are typically 10‑12 mm thick. If they’re down to 3‑4 mm, it’s time to replace them.
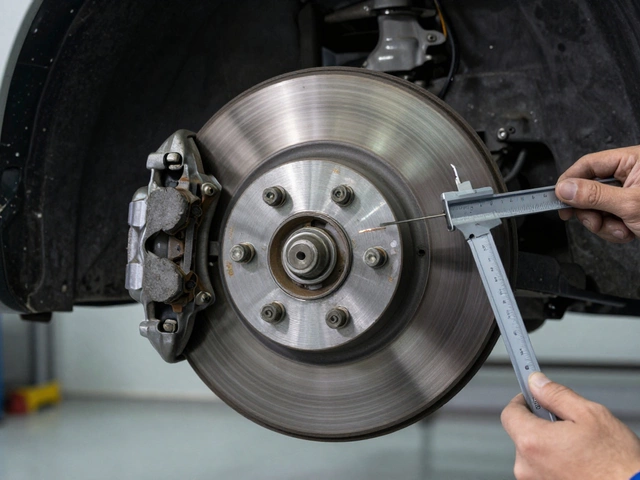
- Rotor measurement: Each vehicle lists a minimum rotor thickness (often 1.0‑1.2 mm for passenger cars). Use a micrometer or a dedicated rotor gauge. If the current thickness is above the minimum, the rotor can stay.
- Visual inspection: Look for deep grooves, rust spots larger than a coin, or a shiny mirror‑like finish (indicates glazing). Light surface rust is normal for a few weeks after a car sits idle.
- Brake feel: A soft pedal or slight pulsing that disappears after a few stops usually points to worn pads, not a damaged disc.
- Noise: A high‑pitched squeal that stops when the pads are warmed up is typical pad wear. Grinding noises, especially metal‑on‑metal, suggest a disc problem.
If all these checks come back clean, you can safely replace the pads and keep the discs.
Risks of Ignoring a Bad Disc
Skipping disc inspection can lead to expensive fallout. Warped rotors cause the brake pedal to pulse and can damage the caliper pins, which are costly to replace. A thin rotor will overheat more quickly, leading to brake fade-where the brakes feel spongy even when you press the pedal hard. In extreme cases, a cracked rotor can shatter, sending metal fragments into the wheel well and potentially causing a loss of control.
How to Inspect Discs Before Deciding
Even if you’re not a mechanic, a quick visual check can give you confidence:
- Measure thickness: Many auto parts stores will measure it for free. Bring a sheet of paper with the minimum spec written on it.
- Check for run‑out: Spin the wheel (car on jack stands) and watch the disc. Any wobble greater than 0.1 mm indicates warping.
- Feel the surface: Run a fingertip over the disc. Rough, uniform texture is good. Sharp peaks or valleys feel uneven.
- Listen while rotating: A consistent “click‑click” is normal from the brake hardware. Rattling or grinding signals trouble.
When in doubt, ask the shop to perform a “rotor profiling” test. It’s a quick laser check that tells you whether the disc is still within spec.
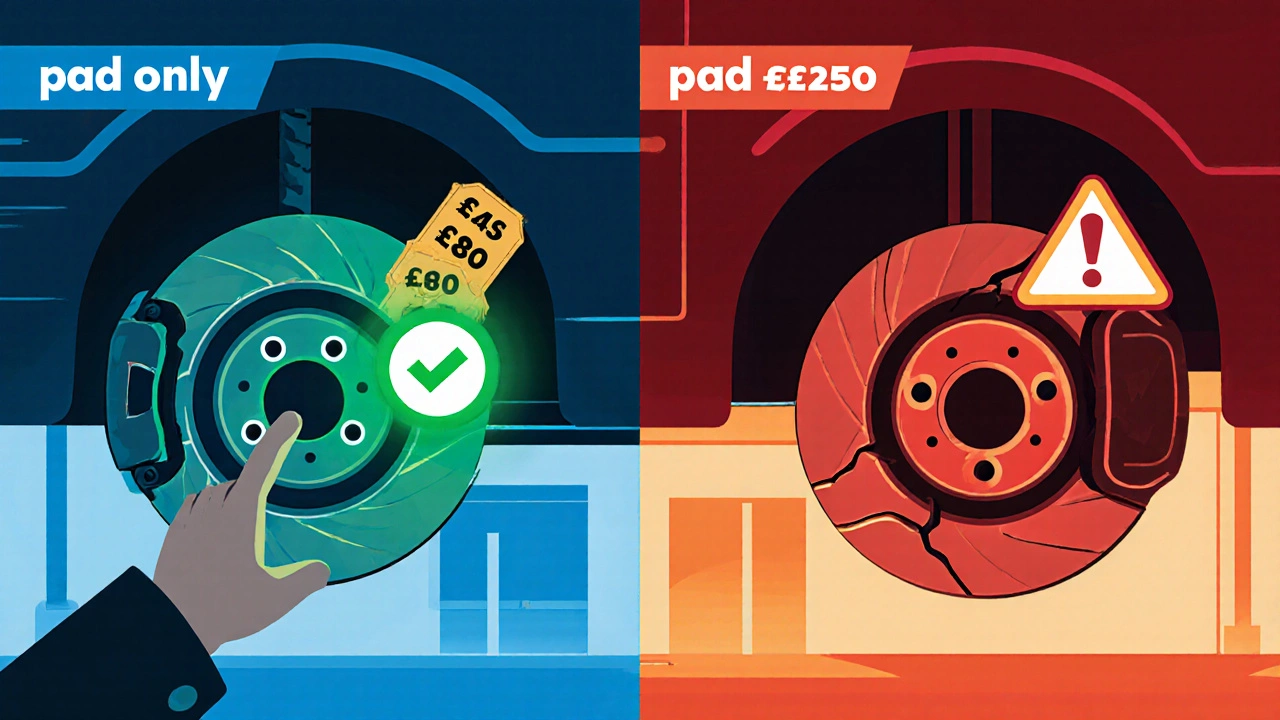
Cost Comparison: Pad‑Only vs. Pad‑and‑Disc Replacement
| Component | Typical Lifespan | Average Parts Cost | Labour Time | When to Replace |
|---|---|---|---|---|
| Brake pads (single set) | 30‑70 k miles | £45‑£80 | 0.5‑1 hour | Pad thickness < 4 mm or squeal |
| Brake discs (rotors) | 80‑120 k miles | £70‑£150 each | 0.75‑1.5 hours | Thickness at minimum spec, warping, deep scoring |
| Full pad‑and‑disc service | Both replaced together | £120‑£250 total | 1.5‑2 hours | Both components near end of life |
As the table shows, swapping just the pads can shave off roughly £60‑£150 in parts and cut labour by about an hour. The savings add up, especially on older cars where the discs are still within spec.
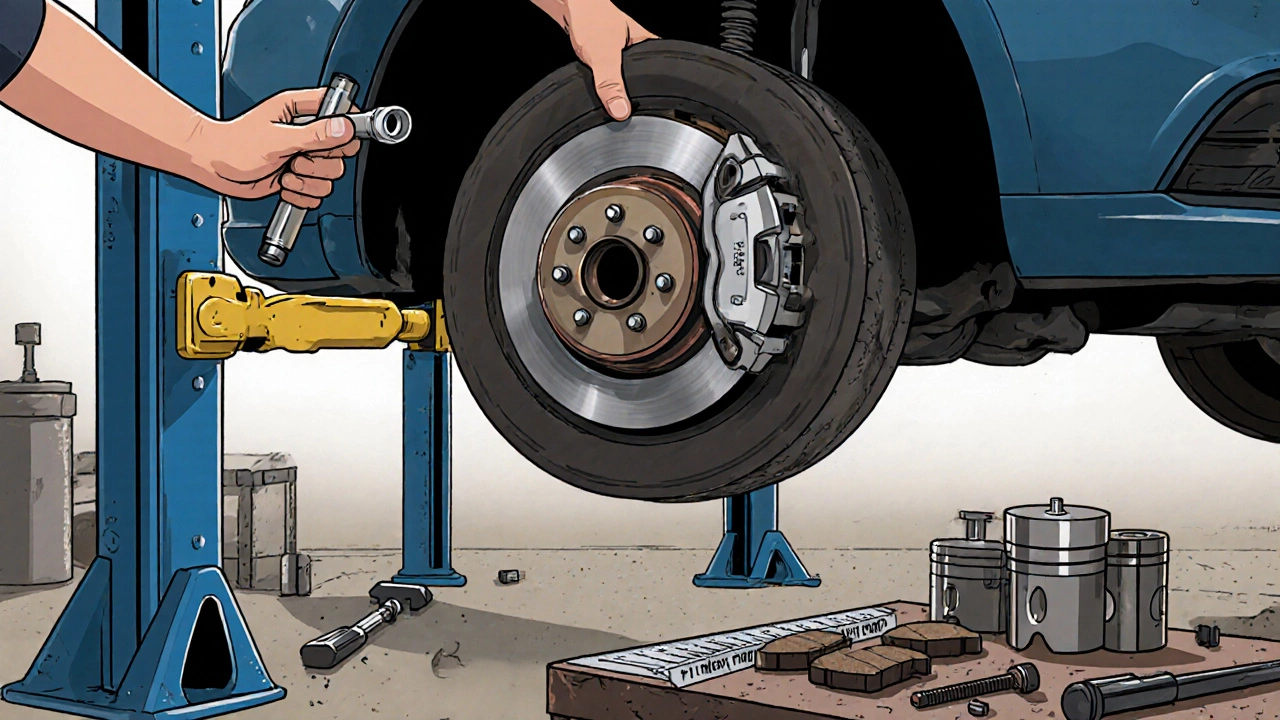
Step‑by‑Step Pad Replacement (Do‑It‑Yourself)
- Lift the vehicle safely with a jack and secure it on stands.
- Remove the wheel and locate the caliper bolts.
- Undo the bolts, slide the caliper off, and support it with a wire or bungee so the pistons don’t retract.
- Take out the old pads. Note any wear‑indicator tabs; they’ll tell you if the pads were overdue.
- Compress the caliper pistons using a C‑clamp or a dedicated piston tool. This creates room for the new, thicker pads.
- Install the new pads, making sure any anti‑rattle clips are seated correctly.
- Re‑mount the caliper, torque the bolts to the maker’s specification (usually 70‑80 Nm for most UK cars).
- Replace the wheel, lower the car, and pump the brake pedal a few times to seat the pads against the disc.
- Conduct a short road test at low speed to verify firm pedal feel and absence of noise.
If after the test you notice pulsation or reduced braking power, stop and have the discs inspected-there’s a good chance the rotors need resurfacing or replacement.
When You Must Replace the Discs
Even with perfect pads, certain conditions force a disc swap:
- Thickness at or below minimum: The disc will overheat and can crack.
- Warping: Measured run‑out greater than 0.1 mm; you’ll feel a pulsating pedal.
- Severe scoring or rust: Deep grooves (>1 mm) or rust patches that cannot be cleaned.
- Cracks: Visible cracks along the edge or centre indicate imminent failure.
- Repeated brake fade after several pad changes, suggesting the disc can’t dissipate heat.
In performance or heavy‑duty vehicles (track cars, tow trucks, etc.), owners often replace discs on a set schedule-every 30‑40 k miles-to keep braking consistent.
Frequently Asked Questions
Do I need to bleed the brake system after changing pads?
Only if the hydraulic line was opened. Most pad swaps keep the system sealed, so bleeding isn’t required. If you notice a soft pedal after the job, a quick bleed will restore firmness.
Can I reuse the old brake pads on the opposite axle?
No. Pads wear unevenly because each axle handles different loads. Always install a fresh set on each axle for balanced performance.
Is it safe to drive with a warped disc until I can replace it?
Driving with a warped disc reduces braking efficiency and can cause the caliper to wear unevenly. It’s best to have it inspected and, if the run‑out is over 0.1 mm, replace it before long trips.
How often should I check my brake disc thickness?
A good rule of thumb is to inspect them every 12 months or every 15 000‑20 000 miles, whichever comes first. If you hear grinding or notice a pulsating pedal, check them immediately.
What pad material is best for everyday UK driving?
For typical city and highway use, ceramic pads offer low dust, quiet operation, and stable wear. Semi‑metallic pads are okay for spirited driving but produce more dust and can be harsher on discs.
Bottom line: you can certainly change the pads and leave the discs if the rotors are still within spec and free of major defects. A quick measurement, visual check, and a test drive will usually give you enough confidence to avoid unnecessary disc replacement, saving both money and downtime.