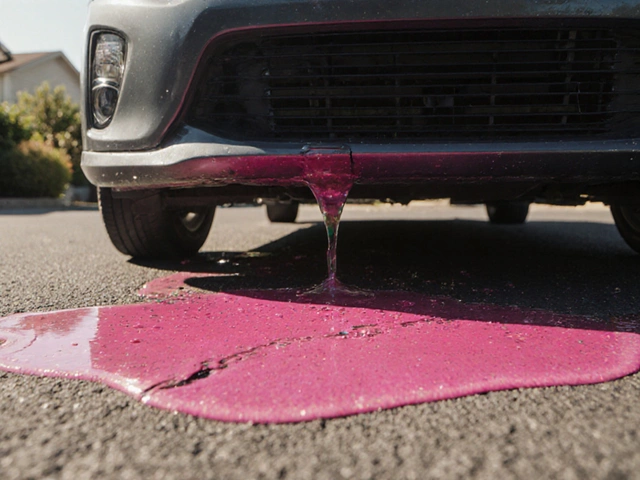
So you popped the hood and saw coolant everywhere. Or maybe your engine's stuck in the red and you’re tired of adding water just to limp around town. A leaky or busted radiator ranks up there with flat tires in the "why now?" list of car headaches. You might have heard horror stories—broken fittings, coolant geysers, or the radiator just refusing to budge. But is replacing a radiator actually hard, or is it just another overhyped backyard mechanic job? Here’s what’s really involved, what can trip you up, and, yes, why some folks end up calling in a pro anyway.
What Makes Radiator Replacement Tricky?
Swapping a car radiator isn’t like changing oil or popping in a new wiper blade. Your radiator is the heart of your cooling system, with hoses, sensors, clamps, and sometimes even transmission lines hanging off it like tangled spaghetti. Age and rust can turn a quick job into an all-day marathon. Not every car is the same, either. On older trucks, radiators just drop out with a few bolts and some patience. On newer vehicles, especially imports, you might have to wriggle out whole plastic shrouds, fans, or even slide the thing out from below after taking off half the front end. Replacing a radiator gets tougher with cramped engine bays and brittle old plastic—it’s all about the car’s design and how much patience you’re packing.
Most radiators hang on with four to six bolts and connect to upper and lower radiator hoses. These hoses usually cling stubbornly to the radiator necks. If your car uses automatic transmission fluid cooling, expect a couple more lines to deal with. Sometimes these lines require special disconnect tools. Oh, and don’t forget—the coolant. Hot antifreeze burns skin, and you don’t want it on the driveway. Draining and collecting coolant without a mess takes some planning, and it’s illegal in lots of places to let it run into storm drains (toxic to pets and wildlife).
Here’s a table laying out the top job-breakers that pop up if you’re not ready for them:
| Problem | Estimated Time Added | Quick Solution |
|---|---|---|
| Stuck or rusted bolts | +30–60 mins | Spray penetrating oil, wait 15 min, use breaker bar |
| Brittle plastic radiators cracking | Varies | Plan to replace radiator, don’t force hoses |
| Transmission cooler lines seized | +45 mins | Line wrench (flare nut), gently wiggle |
| Coolant drainage splashes | Clean-up time | Use wide catch pan, open radiator cap slowly |
| Radiator fan won’t detach | +30 mins | Cushion with rag, gentle prying with flathead |
If you’re swapping a radiator in your driveway, sometimes getting the old hoses off is the hardest part. Hoses can fuse to the radiator neck and need to be teased off carefully—twist, don’t pull. Using a flathead screwdriver to gently pry the edge works, but don’t gouge the metal or you’ll have leaks later. Expect to curse a bit if your car still uses those factory one-use clamp rings instead of the trusty worm-gear clamps from the auto parts store.
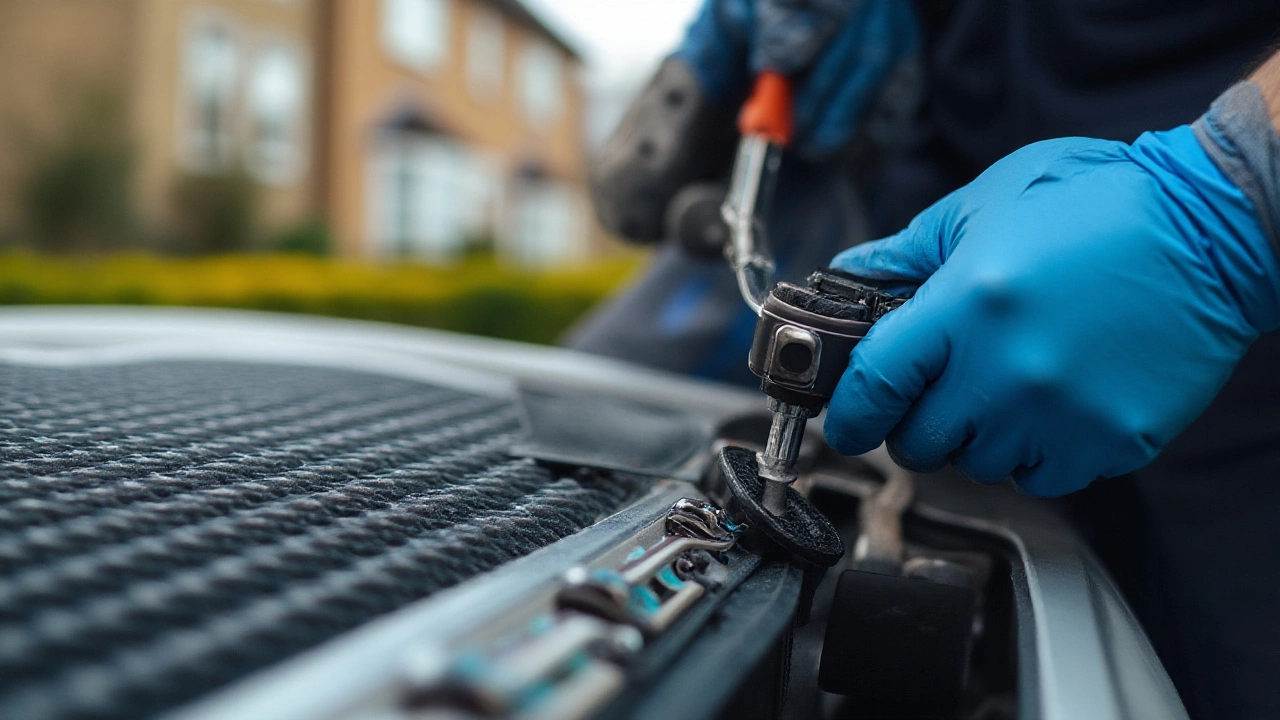
Let’s talk tools. You don’t need an arsenal, but you do need the basics: socket set, long-handled ratchet, pliers, drain pan, and maybe a line wrench if you have an automatic transmission cooling line. Some modern cars demand Torx bits or a special plastic-clip remover. Before cracking anything open, scope out the radiator and take photos with your phone. This is like breadcrumbs for putting it back together—one of those "simple" jobs can turn into a memory test if you stop midway.
If your radiator comes with a cap, that’s easy. If not, swap your old cap onto the new one (but check for cracks in the gasket first; a leaky cap will ruin your day). Double-check all the sensor wires and hose clamps—loose or forgotten sensors can throw "check engine" codes, and it’s no fun backtracking through a sea of green coolant to hunt for a wire you left dangling.
Pro tip: Always buy new hose clamps, and if your car is over 10 years old, consider fresh hoses too. Reinstalling old, hardened hoses is just rolling the dice for a roadside breakdown. Radiator hoses are cheap insurance compared to engine repair.
Step-by-Step: Swapping Out Your Old Radiator
You don’t need to be MacGyver, but you do need a plan. Here’s the real-world process worked out over countless Saturday mornings—and yes, it matters whether you’re working on a Honda Civic or a Ford F-150. But the bones of the job are the same. Set aside at least a full afternoon, because sometimes the smallest troubles eat the most time.
- Let the engine cool down. Seriously—don’t pop that cap if the engine’s anywhere near hot. Hot coolant can explode out under pressure.
- Disconnect the battery. Accidental shorts while swinging a wrench near the fan are a nightmare.
- Drain the coolant. Place your drain pan under the radiator drain (petcock) and loosen it. Slowly remove the radiator cap to speed up draining. Expect about 1.5 to 3 gallons to come out, depending on the car.
- Remove any engine covers or shrouds. Fans and covers often need to come off before the radiator can be lifted out.
- Disconnect hoses and transmission cooler lines. Use pliers to remove spring clamps, or loosen worm clamps with a flat screwdriver or ratchet. Older transmission lines may need a line wrench.
- Remove mounting bolts and any brackets. Expect between 4 and 8 bolts. Keep them organized for reassembly. Some cars use clips that just pop off—pry gently and save all hardware.
- Lift the radiator out. Sometimes it comes right out, but if stuck, check again for missed connections. Radiators can be surprisingly light—most weigh 10 to 15 lbs empty, but awkwardly shaped.
- Compare old and new radiators. Check size, connections, and mounting points match up. There’s nothing more frustrating than trying to squeeze in a slightly-off replacement.
- Install new radiator. Lower gently into place. Be careful not to bang or disturb the cooling fins.
- Reconnect hoses and lines. Tighten clamps firmly but don’t overtighten. Install new clamps if possible.
- Reattach fans or shrouds. Double-check all electrical connectors and fan plugs.
- Close the drain plug. Or insert the bolt, depending on your design.
- Refill coolant. Pour coolant slowly to let bubbles rise out. Squeeze upper radiator hose a few times to "burp" trapped air. Fill to the mark.
- Reconnect battery and start engine. Run with heater on full blast and watch for leaks. Let the car idle up to temperature and keep an eye on the temperature gauge.
- Top off as needed. After cooldown, recheck coolant level, and check for drips under the car.
No two jobs are exactly alike. Occasionally, you’ll need to replace a radiator support or wrestle with a stripped bolt. If something doesn’t feel right, stop and check a repair manual—or watch a video for your car’s make and model. Safety’s not just about your hands; antifreeze is toxic. Clean up afterward, and don’t leave drained coolant where pets could get to it—it tastes sweet and can kill them.
Radiator replacement usually costs $400–$1000 at a shop. Doing it yourself? You’ll typically spend $60–$300 for a quality aftermarket radiator, plus another $10–$40 for hoses and new coolant. Tools rarely cost more than $60 unless something wild breaks. So, for the price of a family dinner out, you can potentially avoid bigger engine repairs and learn a skill that makes car problems way less scary next time.
Pro Tips and Surprises People Don’t Tell You
You’d be amazed how much trouble comes from missing the little stuff. One overlooked bolt, one forgotten wire, and you’re hunting for why the fan doesn’t spin or the engine runs hot. Here’s what often catches first-timers (and even seasoned gearheads) by surprise.
- Radiator flush: If your coolant is rusty or muddy, use a radiator flush before popping in the new part. Let it circulate, then drain and fill. Gunk left behind can clog a new radiator fast.
- Bleed the air: Modern cars are sensitive to air pockets. Park nose-up on a slope and bleed the cooling system with the bleeder screw if you have one. No screw? Just run the car with the heater on and top off after degassing.
- Pressure test after install: Most auto parts stores rent radiator pressure testers for free. Pressure test your work before calling it done; this helps catch leaks around hoses or the radiator cap you might’ve missed.
- Label sensor wires: Clip-on tags or colored tape go a long way, especially when you’re in the home stretch and find an "orphan" plug that needs a home.
- Transmission fluid: If you disconnect ATF lines, check transmission fluid levels afterward, or risk shifting problems. Top off slowly and double-check your levels.
- Sweat the details: Wipe oil or coolant spills right away from the engine bay. It’s easier now than after the first hot drive bakes the fluid into a sticky mess.
Did you know that a poorly installed radiator cap can actually drop cooling system pressure and lead to "phantom" overheating? It’s not the radiator’s fault—the cap’s spring holds in up to 16 psi. Lose just a few pounds and boiling starts sooner. Another fun fact: some European cars tuck their radiators behind AC condensers. You’ll need to pull the bumper off for access. Now, if you have a 2000s-era Toyota or Honda, consider yourself lucky—these radiators are usually an hour-long swap, and most parts stores keep them in stock.
If you get stuck, don’t beat yourself up. Roughly one in five DIY radiator swaps end up needing help for something unexpected—broken sensor clips, stripped drain plugs, cracked fan shrouds, or the classic "why is there a sensor here?" surprise. But you really do learn as you go, and most first-timers finish with all fingers intact and a newfound respect for cooling systems. Got a friend who’s done it before? Call them over for moral support (and maybe pizza).
So, is replacing a radiator a difficult job? Not if you walk in armed with a little patience, the right tools, some tips, and no fear of occasionally re-reading the instructions. Don’t rush, keep your workspace organized, snap a few progress pics with your phone, and check your work twice before firing up the engine. Sure, you’ll likely finish tired and with some mystery scratches, but there’s real satisfaction in knowing the job’s done right—and the next time your engine keeps cool in rush hour, you’ll know you earned it.