Suspension Noise Diagnostic Quiz
TL;DR
- Identify the source: shock, strut, bushing, or bush.
- Inspect for leaks, wear, or loose mounts.
- Replace worn components (shocks, bushings, control arms) before they cause more damage.
- Check alignment and tire condition to rule out secondary noise sources.
- Perform a road test and listen for improvement.
When your car starts to rattle over a pothole or hum on smooth pavement, the culprit is usually the noisy suspension. It’s not just an annoyance; persistent knock can signal worn parts that may affect safety and handling. This guide walks you through diagnosing the source, fixing common problems, and preventing future noise.
Understanding the Suspension System
Vehicle suspension is a network of springs, dampers, and linkages that supports the vehicle body, maintains tire contact, and absorbs road irregularities. It consists of several key components, each playing a distinct role in damping vibrations and controlling ride height. Knowing how they interact helps you pinpoint why a clunk or squeak occurs.
Key Components That Can Cause Noise
Below are the primary parts most often responsible for a noisy suspension:
- Shock absorber is a hydraulic damper that controls spring rebound and compressive forces. Leaking fluid or worn pistons create a thudding knock.
- Strut is a combined structural support and damper, commonly found in front‑end assemblies. A cracked strut housing often produces a metallic squeal.
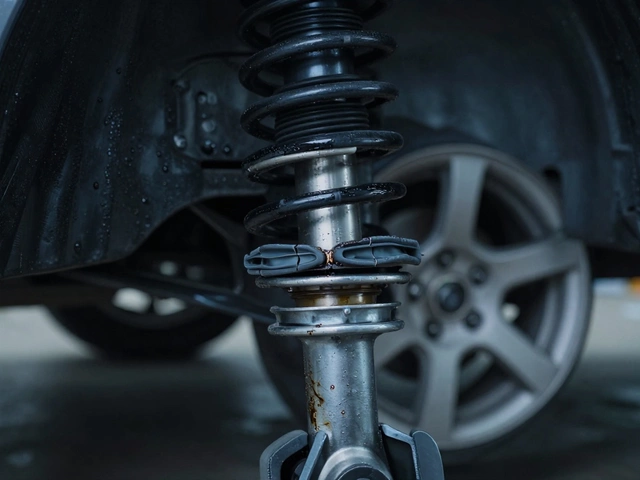
- Coil spring is a steel coil that stores energy to support vehicle weight. Broken or improperly seated springs can slap against the mount.
- Bushing is a rubber or polyurethane isolator that cushions joints and reduces vibration. Dried‑out bushings generate a high‑pitched squeak.
- Control arm is a rigid link connecting the wheel hub to the chassis, guided by bushings. Loose ball joints in the arm cause clunking during turns.
- Sway bar is a torsion rod that reduces body roll, anchored by bushings. Worn sway‑bar links create rattles when cornering.
Diagnosing the Source of the Noise
Effective diagnosis saves time and money. Follow this systematic approach:
- Visual inspection. Look for fluid stains on shocks/struts, cracked housings, or rusted mounting bolts.
- Physical feel. Push down on each corner of the vehicle. Excessive bounce suggests worn dampers; a single “pop” points to a broken spring.
- Listen while driving. With the windows up, drive at 30mph on a smooth road. A consistent thump on every bump usually means a shock absorber; an intermittent squeak that changes with steering hints at bushings or sway‑bar links.
- Check for NVH influences. NVH (Noise, Vibration, Harshness) can be amplified by tire wear, wheel bearing play, or even loose exhaust components. Rule these out before tearing apart the suspension.
Common Fixes and When to Apply Them
Once the offending component is identified, choose the right repair path.
1. Replacing Worn Shock Absorbers or Struts
Typical signs: fluid leaks, visible oil on the shock body, or a continuous “bouncing” feeling after hitting a bump.
- Gather tools: jack, jack stands, socket set, torque wrench.
- Raise the vehicle and support it securely.
- Remove the wheel, then detach the top mount bolt (often accessed from the engine bay) and the lower bolt at the control arm.
- Compress the old shock with a spring compressor if you’re re‑using the spring; otherwise replace the entire strut assembly.
- Install the new unit, torque bolts to manufacturer specifications (usually 80‑100Nm for passenger cars), and lower the car.
After reinstall, perform a road test. The car should no longer rebound excessively.
2. Swapping Out Dried‑Out Bushings
Bushings are cheap but critical for noise isolation. Look for cracks, extrusion, or visible wear.
- Heat the bushing with a heat gun to soften the rubber.
- Use a bushing press or a large socket and hammer to pop the old bushing out.
- Press the new polyurethane bushing in, aligning it with the mounting holes.
- Re‑assemble the control arm or sway‑bar link.
Polyurethane lasts longer and reduces squeak, though it can transmit a slightly harsher ride - a trade‑off many drivers accept for silence.
3. Repairing a Broken Coil Spring
Never attempt to bend a broken spring; it can snap under load.
- Support the vehicle with a jack stand under the spring seat.
- Remove the strut or shock to free the spring.
- Swap in a new spring matching the OEM rate (e.g., 250N/mm for a midsize sedan).
- Re‑assemble the assembly, ensuring the spring is centered and seated evenly.
4. Tightening Loose Ball Joints or Control Arm Bolts
Loose fasteners produce a metallic clunk that intensifies during cornering.
- Check torque specs (often 150‑180Nm for ball‑joint nuts).
- Apply thread‑locker where recommended.
- Replace a stripped nut or damaged splined joint immediately.
5. Addressing Secondary NVH Sources
Sometimes the suspension is fine, but tire wear or a worn wheel bearing mimics a knock.
- Inspect tire tread depth; uneven wear >1/8in can cause vibration.
- Spin the wheel with the car lifted; excessive play indicates a bearing issue.
- Check exhaust hangers; a loose hanger can transmit engine vibration through the chassis.

Comparison of Common Suspension Parts
| Component | Primary Function | Typical Failure Symptom | Replacement Cost (USD) |
|---|---|---|---|
| Shock absorber | Damps rebound/compression | Thudding knock, fluid leak | $80‑$200 per unit |
| Strut | Structural support + damping | Metallic squeal, uneven ride height | $120‑$250 per unit |
| Coil spring | Supports vehicle weight, stores energy | Hard slap, sagging chassis | $30‑$100 per coil |
Preventive Maintenance Tips
Keeping the suspension quiet is easier than fixing it later. Adopt these habits:
- Inspect bushings and mounts every 12months; replace any that show cracks.
- Swap shocks/struts every 80,000‑100,000km (or per OEM interval).
- Rotate tires regularly to promote even wear, which reduces vibration.
- Perform a quick “bounce test” after each major service to catch early damper wear.
When to Seek Professional Help
Some noises indicate deeper chassis issues or require specialized tools (e.g., spring compressors). If you encounter any of the following, get a qualified mechanic involved:
- Persistent clunk despite new shocks and bushings.
- Unusual noises coming from the frame or subframe.
- Alignment readings out of spec after component replacement.
Next Steps in Your Suspension Journey
Now that you know how to silence a noisy setup, you might explore related topics such as wheel alignment procedures, NVH reduction techniques for performance cars, or upgrading to adjustable coil‑overs. Each area builds on the fundamentals covered here, deepening your automotive know‑how.
Frequently Asked Questions
What causes a knocking sound only when hitting bumps?
A knocking sound that follows every bump usually points to worn shock absorbers or a broken coil spring. The damper can’t control spring rebound, so the spring slaps against its seat, producing a thump.
How can I tell if my suspension bushings are the problem?
Dry or cracked bushings often squeak during low‑speed turns or when the car is at rest. Visually inspect for cracks or missing rubber, and feel for excess play in control arms while the vehicle is lifted.
Do struts replace both the shock and the spring?
Yes. A strut combines a shock absorber’s damping function with the structural role of the spring mount. In many front‑end designs the spring sits inside the strut tube, so replacing a strut swaps both parts at once.
Is it safe to drive with a broken coil spring?
Driving on a broken spring is risky. The chassis can sag, causing uneven tire wear, poor handling, and possible loss of control during cornering. Replace it promptly.
What torque should I use for rear shock absorber mounting bolts?
Most rear shock mounting bolts are spec'd between 70‑90Nm. Always check the vehicle’s service manual for the exact figure and use a calibrated torque wrench.