Suspension Test Checklist
Suspension Tests Checklist
Select the tests you've completed and review your results below.
Visual Inspection
Check for oil stains, dents, cracks, or worn bushings.
Bounce Test
Press down on the vehicle and observe how many bounces occur.
Sway Bar Test
Check for excessive play in the sway bar end links.
Steering Throw Test
Check for excessive free play or clunking sounds.
Leak Detection
Look for oil stains under shocks or struts.
Road-Feel Evaluation
Drive over bumps and evaluate handling response.
Feeling a wobble when you hit a pothole? Noticing uneven tyre wear? Those clues usually point to the Suspension is the system of springs, dampers and linkages that keeps your car’s wheels in contact with the road while absorbing bumps. Knowing how to perform a basic suspension test lets you spot problems before they turn into costly repairs or unsafe driving conditions.
Key Takeaways
- Visual checks catch worn bushings, leaks and broken parts.
- The bounce test instantly tells you if shocks or struts need attention.
- Road‑feel tests (sway bar and turning tests) reveal handling issues.
- Safety gear - a jack, jack stands and a pry bar - makes DIY checks risk‑free.
- Replace components only when symptoms match the wear pattern, otherwise seek a professional alignment.
Why Testing Your Suspension Matters
A healthy suspension does three things: it supports the vehicle’s weight, it controls tyre contact, and it dampens road shocks. When any of those jobs fail, you’ll notice a rough ride, poor handling, or uneven tyre wear. Early detection lets you fix the issue before it causes tyre damage, steering wear or even a safety‑critical failure.
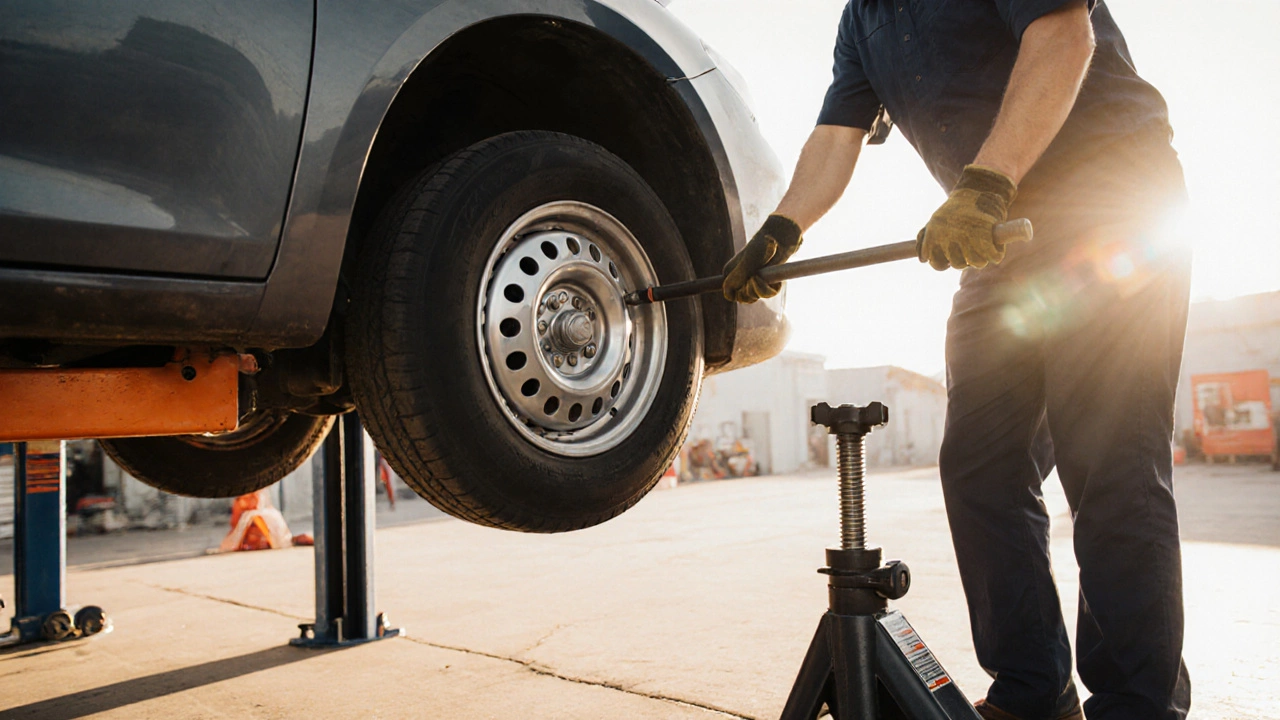
Essential Tools for a DIY Suspension Test
You don’t need a garage full of equipment. A few items make the process safe and accurate:
- Jack - lifts the wheel off the ground.
- Jack stands - keep the car stable while you work.
- Torque wrench - ensures bolts are tightened to factory specs.
- Pry bar - helps spot play in bushings and ball joints.
- Flashlight - shines into hard‑to‑see areas.
- Pen and paper - record observations.
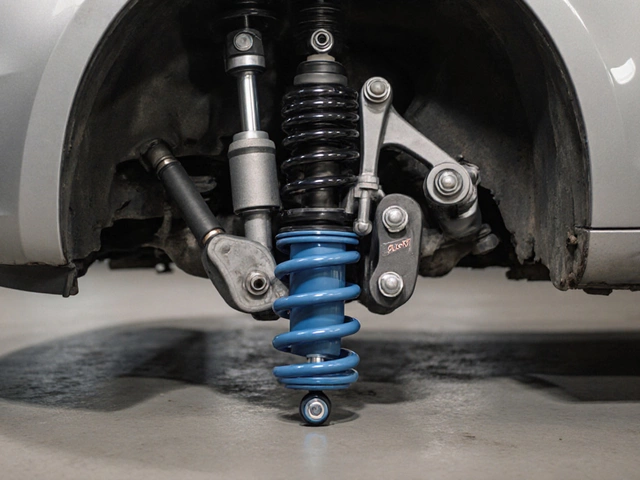
Step 1: Visual Inspection of Major Components
Start with the car parked on a flat surface, wheels straight. Look for obvious signs of damage:
- Check the Shock absorber and Strut. Look for oil stains, dents, or rust on the cylinder.
- Inspect the coil Spring. It should be intact, no cracks or broken coils.
- Examine the Sway bar and its end links for torn bushings or loosened bolts.
- Look at each Control arm and Ball joint. A cracked or corroded joint usually shows metal flakes or grease leakage.
- Notice any uneven tyre wear patterns - cupping, feathering or excessive wear on one edge - they’re a strong indicator of suspension mis‑alignment.
If you spot any of the above, note the location and move to the next test to confirm the severity.
Step 2: The Bounce Test - Quick Check for Damping
The bounce test tells you whether the damper is doing its job. Here’s how:
- Park the car on a firm, flat surface.
- Press firmly on the front of the vehicle near the wheel, then release suddenly.
- Watch how many times the wheel rebounds. One solid bounce followed by a quick settle means the shock or strut is healthy. Continuous bouncing (more than two cycles) signals worn damping.
Repeat on the rear wheels. If both ends show excessive bounce, both front and rear dampers likely need replacement.
Step 3: Sway Bar (Anti‑Roll Bar) Test - Assessing Body Roll
The sway bar reduces body roll during cornering. A simple way to test it is the ‘push‑pull’ method:
- Raise one front wheel with the Jack and support it on a stand.
- Grab the lower control arm on the lifted side and try to move it forward and backward with your hands or a pry bar.
- If you feel a lot of play, the sway bar end link or its bushings are likely worn.
Do the same on the opposite side to compare. Consistent looseness suggests you should replace the end links or the bushings.
Step 4: Steering Throw Test - Checking for Play
While seated in the driver’s seat, turn the steering wheel fully left and fully right. Observe the wheel movement:
- Excessive free play before the wheels respond indicates worn steering components, often the tie‑rod ends or ball joints.
- Listen for clunking noises - they usually point to a loose control arm or a failing bushings.
If you detect any of these, a deeper inspection of the Tie‑rod and related joints is warranted.
Step 5: Leak Detection - Spotting Damper Fluid Loss
Leaks are the silent killers of suspension performance. After the visual check, place a clean rag under each shock, strut and spring seat while the car sits for 10‑15 minutes. Dark oily spots mean the internal seals are compromised.
Replace any leaking damper with a unit that matches the original specifications - typically listed in the vehicle’s service manual (e.g., 15mm thread, 500psi rated).
Step 6: Road‑Feel Evaluation - Real‑World Test
Take the car for a short drive that includes the following maneuvers:
- Drive over a speed bump at 10mph. A firm ‘thump’ without excessive bounce indicates good shimmy control. \n
- Make a series of quick left‑right turns at low speed. Excessive body lean or a rattling sound signals sway bar or bushings wear.
- Accelerate hard from a stop on a smooth road. A stable rear end suggests the rear suspension and anti‑roll bar are intact.
Take notes on any unusual sensations; they’ll guide you to the problematic component.

Comparison of Common Suspension Tests
| Test | Primary Goal | Tools Needed | Key Indicator of Failure |
|---|---|---|---|
| Visual Inspection | Identify obvious wear, leaks, cracks | Flashlight, pry bar | Oil stains, broken bushings, cracked springs |
| Bounce Test | Check damper performance | None (just the car) | More than one bounce per wheel |
| Sway Bar Test | Assess anti‑roll effectiveness | Jack, jack stand, pry bar | Excessive play in end links |
| Road‑Feel Evaluation | Feel real‑world handling | None (just the car) | Uneven body roll, rattles, poor bump absorption |
When to Replace Parts vs. When to Seek Professional Help
If a component shows obvious damage (e.g., cracked spring, leaking shock) you can replace it yourself provided you have the right tools and a service manual. However, some tasks-like wheel alignment after a major suspension component swap-require a calibrated alignment machine. Also, if you notice persistent steering pull after replacing shocks, it could be a subtler geometry issue that only a professional can diagnose.
Safety Checklist Before Starting Any Suspension Work
- Park on level ground, apply the handbrake.
- Use wheel chocks on the opposite side of the lifted wheel.
- Never rely on the jack alone; always use jack stands.
- Wear safety glasses and gloves.
- Check tyre pressure; low pressure can mask suspension symptoms.
Tips to Prolong Suspension Life
- Avoid potholes whenever possible; they accelerate bushing wear.
- Keep wheels aligned every 12,000mi or when you notice uneven wear.
- Replace worn tyre sidewalls promptly - they affect ride quality.
- Use high‑quality shock absorbers that match your vehicle’s weight class.
- Regularly clean under‑car debris that can corrode mounts.
Frequently Asked Questions
How often should I perform a suspension test?
A basic visual and bounce test every 10,000mi or at each service interval keeps you ahead of major wear. After hitting a big pothole or after any collision, run a full test immediately.
Can I replace a shock absorber without a professional alignment?
Yes, you can replace the shock itself, but after installation you should have the wheel alignment checked. Incorrect geometry can cause uneven tyre wear even if the new shock works perfectly.
What does a ‘clunk’ sound when turning indicate?
A clunk usually points to worn ball joints, tie‑rod ends, or control arm bushings. The noise appears when the joint shifts under load, so inspect those parts closely.
Is it safe to drive with a leaking rear shock?
Driving with a leaking shock reduces damping and can lead to excessive bounce and loss of control, especially in wet or uneven conditions. Replace it as soon as possible.
Do I need special tools to test my suspension?
For a basic inspection you only need a jack, jack stands, a pry bar and a flashlight. Advanced diagnostics, like measuring bounce dampening rates, require a shock tester, which most hobbyists don’t need.